• English
  • 简体中文
  • 繁體中文
  • 한국어
  • ภาษาไทย
  • Bahasa Melayu
  • 日本語
pixivision
Make it interesting
Explore
  • Illustrations
  • Manga
  • Novels
Create
  • Tutorials
  • Behind the Art
  • Materials
Discover
  • Interviews
  • Columns
  • News
  • Top
  • Behind the Art
  • How to go about doing Ita-Nail art! Tutorial for Noriaki Kakyoin Nails (Jojo’s Bizarre Adventure)
Behind the Art
2017.01.28

How to go about doing Ita-Nail art! Tutorial for Noriaki Kakyoin Nails (Jojo’s Bizarre Adventure)
  • making-of
  • JoJo's Bizarre Adventure
  • ita nails
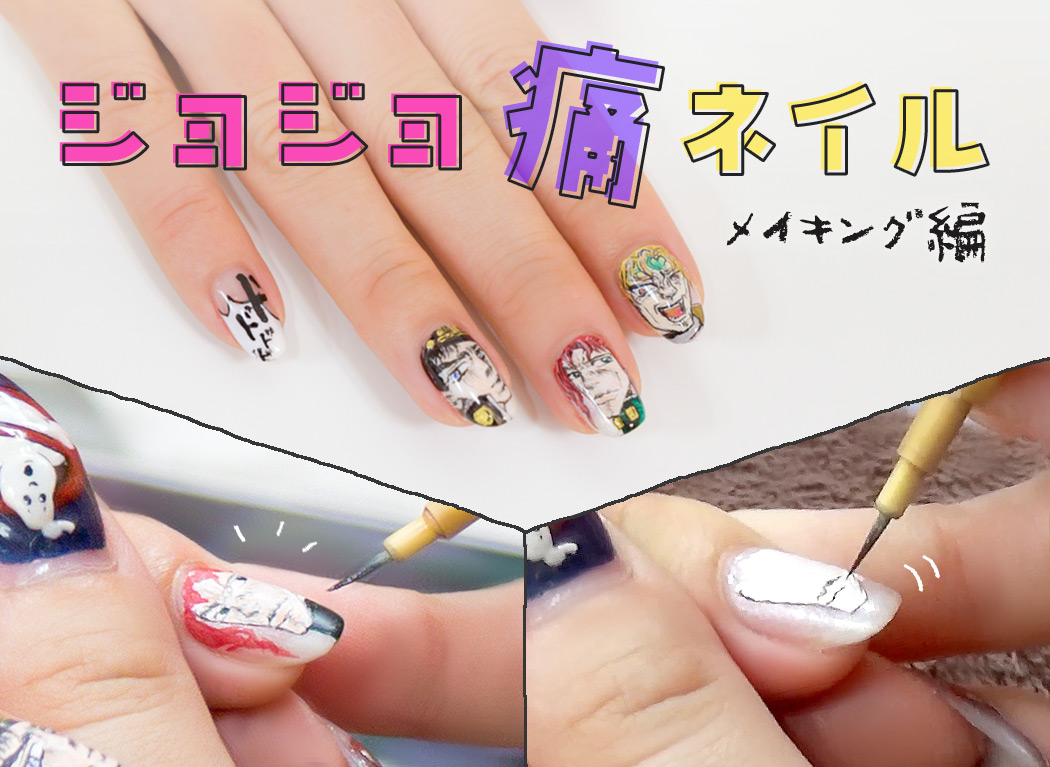
Ita-Nails refer to a form of nail art where you paint your favorite characters onto your nails. It's the perfect type of nail art for you to always be by the side of your favorite character!


There're many anime and manga lovers out there who have probably thought about trying out Ita-Nail art. However, it's definitely not an easy task trying to fit a character into the confined spaces of your nails with typical drawing techniques.


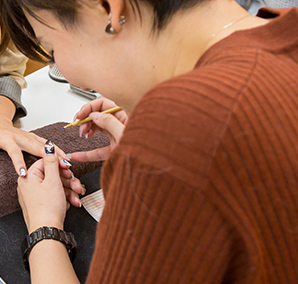
To solve this problem, we made our way to professional nail artist, Mr. Miyamoto, who offers Ita-Nail services! In the previous article, we looked at the entire process in a 1 minute video, but we’re going to go through the steps carefully one by one, from base coloring to lining, coloring, shadowing and the final touches.

We tried drawing Noriaki Kakyoin from JoJo's Bizarre Adventure!
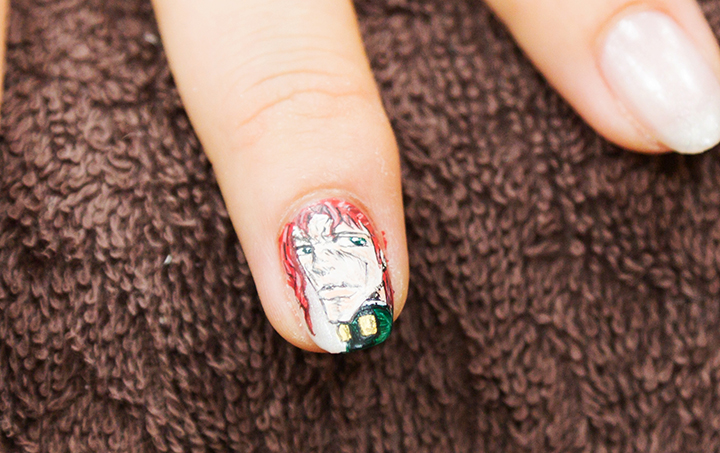
In this article, we tried out Noriaki Kakyoin, one of the main characters from JoJo's Bizarre Adventure. His bold and deep features, not forgetting that eccentric red hair makes him really stand out.

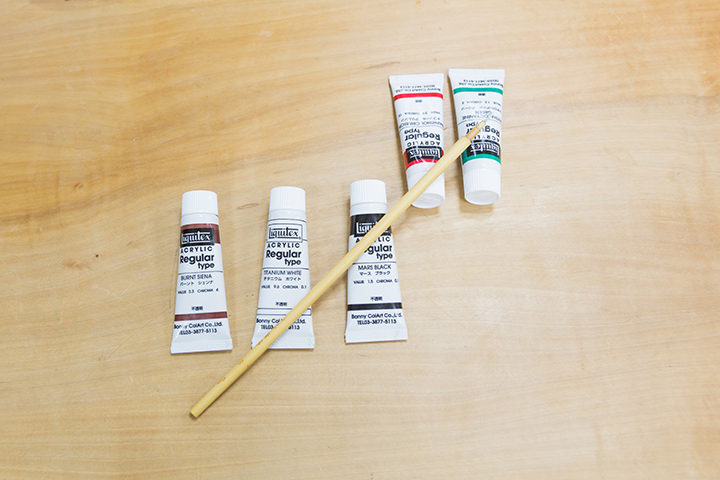
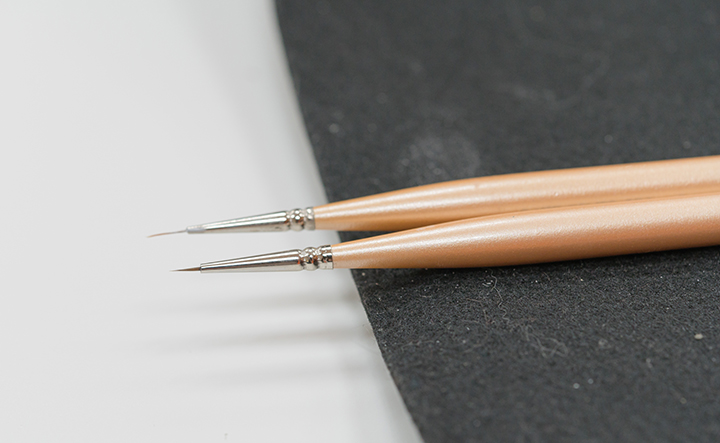
These are the materials we used!

We used acrylic paints in brown, white, black, red and green, and an ultra-fine brush. The acrylic paints we normally use in art class are no problem either.


Well then, let’s get down to it! 

1. Base Coloring
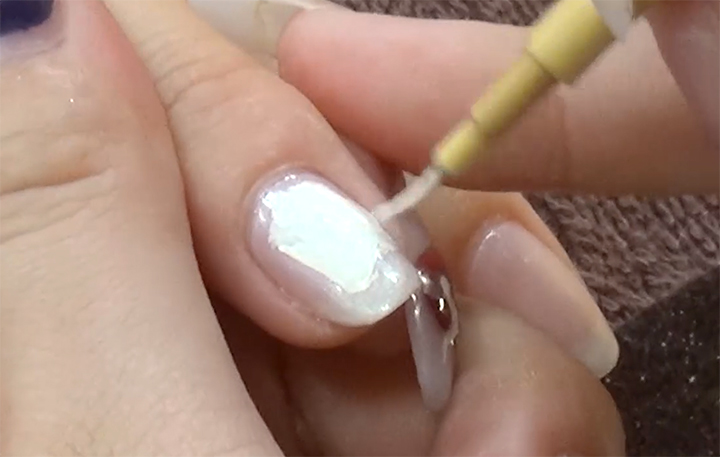
We’ll be giving the contour a base layer of color first.

Kakyoin has fair skin, so we keep the brown used here to a minimum. We’ll add the hair and clothes over it later so don’t worry if you mess up a little here!

2. Lining

We use black paint to go around the character’s contours carefully.


This is a key step to really capture that Jojo-ish Feel. We asked Miyamoto for more details!

Point 1: Use an ultra-fine brush and paint as if the ink is drying up
The art is one of the features of Jojo that makes the show special. In order to replicate that, I drew in the shadows with an ultra-fine brush. The key here is to draw lines as if the ink is drying up.
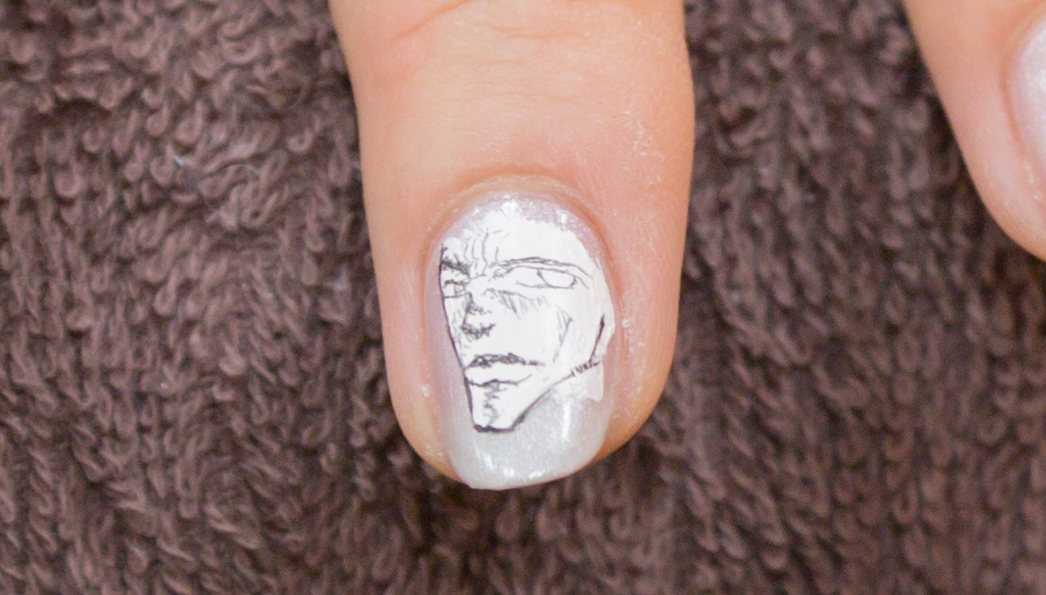
▲ Draw in the dark shadows around the contours and eyes, as well as the nose and forehead in black.

Point 2: Use bold beige tones for shadows on the face
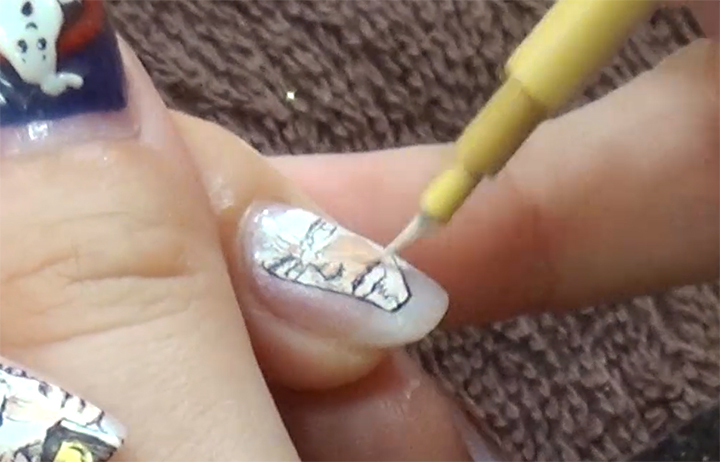
Originally, shadowing should come last but the bold contours of his face are his selling point, so we’ll be jumping right into the shadowing at this step! Repeat this process over and over again to make sure the shadows on his face don’t lose out to the brightness of his hair and clothes.
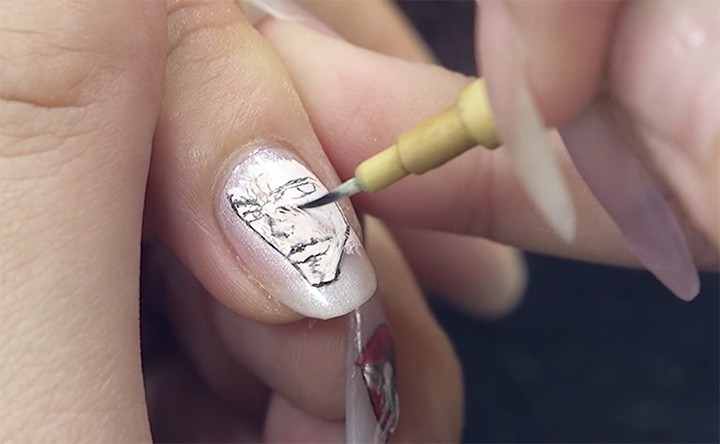
After painting in a bold brown color, add a brighter color over it. Add black shadows over it, to complete the lining of the face.

3. Coloring

Next up, we’ll be adding colors.


We’ll be using red for the hair and a dark green for his eyes and clothes here. Adjust the colors by adding white and black to the red and green paints.
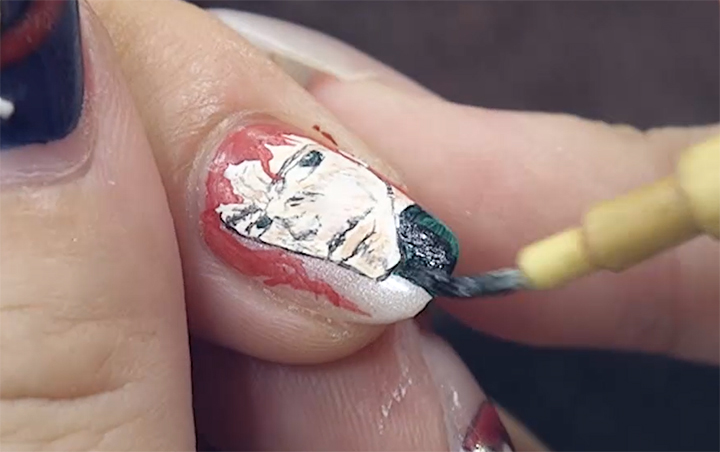
Once we’re done with the hair and clothes, our nail art is almost complete! Let’s look at highlights and shadowing here.

4. Highlights and shadowing

We’ve already done some shadowing for his face at the lining stage, but we’ll be adding even more here.


Add dark skin tones over the forehead, and white highlights where his fringe stands up, giving it a 3D effect.
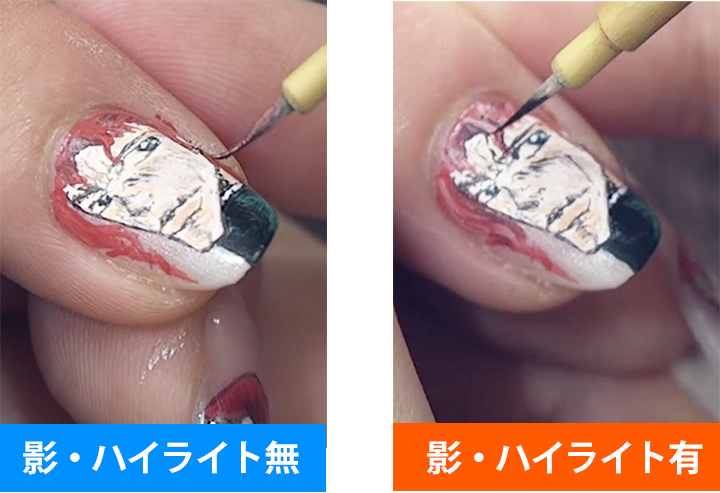
It looks much better than right after the coloring stage.

5. Complete!

And we’re done with our Noriaki Kakyoin nails! Took around 30 mins.

We got some advice for Ita-Nail Art beginners from Miyamoto!

- Great work! Jojo’s characters tend to be very detailed and appear a little too challenging for beginners. Are there characters you would recommend for beginners?

Disney characters or your own pets tend to be easier. Or you could try out band logos as well. You may want to have a professional do it for you first so you and grasp an idea of the flow of steps!

- I see! Is there anything we should take note off when requesting from nail artists? 

Always bring a reference illustration of the thing you’re thinking of! It could be an image in your smartphone, or on printed paper. Try to make it easier for the nail artists because they’re drawing without any practice on that particularly character.

- Thank you!

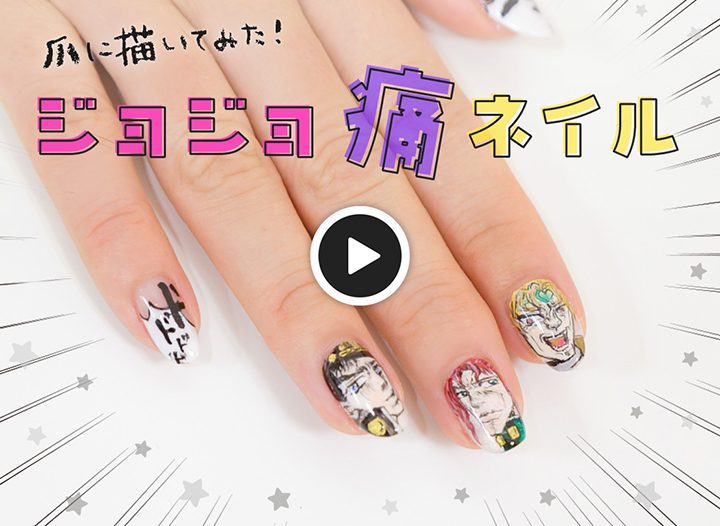
Apart from Noriaki Kakyoin from JoJo's Bizarre Adventure, we also have a making-of video for other popular characters, Jotaro Kujo and DIO.


▼ Jotaru Kujo and DIO’s making-of video here


[Ita-Nail Art] We tried drawing Jotaro Kujo, Noriaki Kakyoin and DIO! (From Jojo’s Bizarre Adventure)


Next up, we’ll be recreating the Transformation Compact Mirror from Sailor Moon into 3D nail art. How in the world is this 3D art that seems like it’s about to jump out at you created? Don’t miss it!
Newest articles tagged ita nails

  • Ita-Nail Movie - Drawing Challenge: Jotaro Kujo, Noriaki Kakyoin and DIO! (JoJo's Bizarre Adventure)

    Ita-Nail Movie - Drawing Challenge: Jotaro Kujo, Noriaki Kakyoin and DIO! (JoJo's Bizarre Adventure)

  • The Making of 13 Copic Drawings - A Lesson in Coloring

    The Making of 13 Copic Drawings - A Lesson in Coloring

  • The Making of 15 Watercolor and Colored Pencil Drawings - A Glimpse Behind the Scenes

    The Making of 15 Watercolor and Colored Pencil Drawings - A Glimpse Behind the Scenes

If you liked ita nails, you will also love...

  • Rella making-of and interview - Drawing a peaceful and elegant world with Adobe Photoshop CC

    Rella making-of and interview - Drawing a peaceful and elegant world with Adobe Photoshop CC

  • Interview with the artist “Wannyanpuu” and making of “Ugoira!” The particulars behind the creator’s craftsmanship.

    Interview with the artist “Wannyanpuu” and making of “Ugoira!” The particulars behind the creator’s craftsmanship.

  • Creating sparkling, kawaii drawings - Making & Interview With Eku Uekura

    Creating sparkling, kawaii drawings - Making & Interview With Eku Uekura

Share this article
  • Share
  • Post
  • Share
  • Post

Tags:

  • making-of
  • JoJo's Bizarre Adventure
  • ita nails
Follow pixivision on Facebook!
Find us on X too!
Follow @pixivision
Stay updated with pixivision's daily features!

Newest articles tagged Behind the Art

  • The Making of 13 Copic Drawings - A Lesson in Coloring

    The Making of 13 Copic Drawings - A Lesson in Coloring

  • The Making of 15 Watercolor and Colored Pencil Drawings - A Glimpse Behind the Scenes

    The Making of 15 Watercolor and Colored Pencil Drawings - A Glimpse Behind the Scenes

  • Are you ready for Comiket? Useful Techniques For Your Event Booth

    Are you ready for Comiket? Useful Techniques For Your Event Booth

  • Wait a second! (Almost) Useless Tutorials

    Wait a second! (Almost) Useless Tutorials

View more▶︎

Follow pixivision's
official accounts!

p-chanMonthly Ranking
  • Illustrations

    Drawings of Patterned Bikinis - Pre...

  • Illustrations

    Drawings of Pools at Night - After ...

  • Illustrations

    Fan Art of Kisaki (Swimsuit) from B...

  • Illustrations

    Drawings of Flared and Frilled Biki...

  • Illustrations

    Drawings of Streaked Hair - Lucky S...

p-chanFeatured
  • Illustrations

    Announcing the Results of pixiv’s K...

  • Illustrations

    Fan Art of Mualani from Genshin Imp...

  • Illustrations

    [Featured Articles] Fan Art of Zenl...

  • Illustrations

    Drawings Featuring Tied Hems - Knot...

  • Interviews

    Interview with Miyuki Kitamuro, edi...

Follow pixivision's
official accounts!

  • Top
  • About pixivision
  • Suggest a theme
  • English
  • 简体中文
  • 繁體中文
  • 한국어
  • ภาษาไทย
  • Bahasa Melayu
  • 日本語
  • pixivision
  • About pixiv Inc.
  • Terms of Use
  • Contact Us
  • Advertising
  • Privacy Policy
©pixiv