Takuma Terashima’s Illustration Literacy #3 Tackling Coloring with Manga Artist Shirow Miwa!
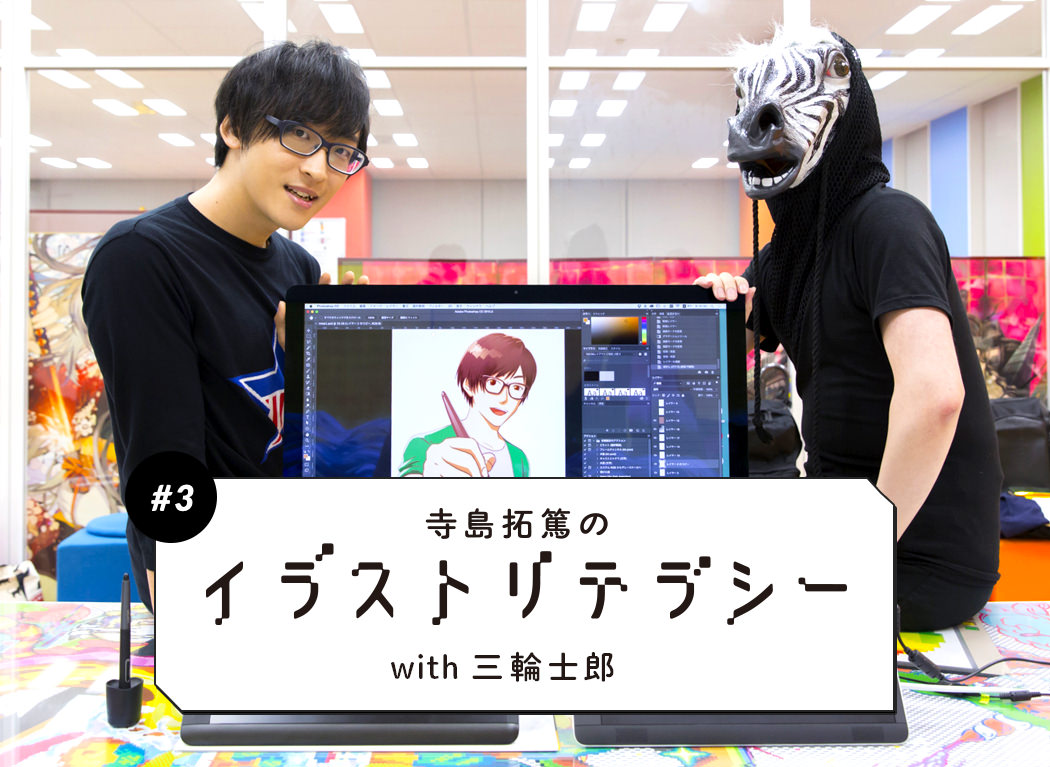
Interviewer, Author: Yohei Ogawa Photography: Hiroyuki Yamaguchi
Pen Tablet Provided by: Wacom
Welcome to Part 3 of the series, Takuma Terashima’s Illustration Literacy, which came about due to voice actor, Takuma Terishima’s desire to become better at illustrating.
We have looked at the process of creating a pixiv profile icon from scratch, and can finally see the light at the end of the tunnel!
Well then, let us check out the coloring process!
▲Where we stopped previously after shadowing! Let us add in the colors this round.
Coloring can be done roughly! Let’s do a rough coloring over before finalizing the details
From lining to shading, we are finally entering the final stage of coloring.
Terashima has never done any coloring, and appears to be a little worried, but Miwa reassures him casually. The shading process went well, but will we be able to see a success this round…?!
Use the Magic Wand tool to select the area and color it in completely. Keep layering to a minimum
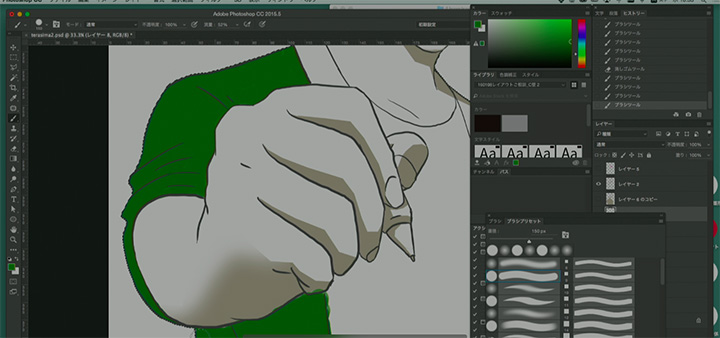
Pick out the character with the Magic Wand tool, and slap a layer of color over it. You can make corrections to the colors after that, so you can just do a vague layer of coloring now. Let’s start from the cardigan and move in.
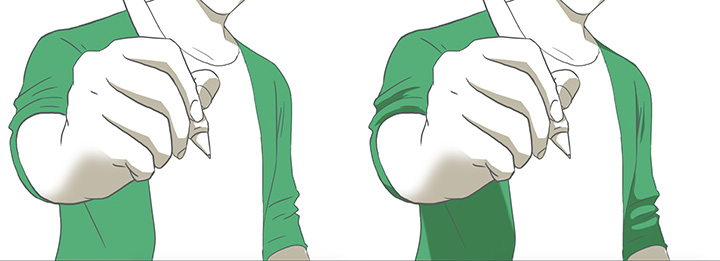
After finishing the coloring, switch the layer from Normal to Multiply. Upon doing this, the shading will come into effect (Normal on the left, Multiply on the right).
The large difference made by that one action made Terashima exclaim in surprise, “The Multiply layer is amazing!”
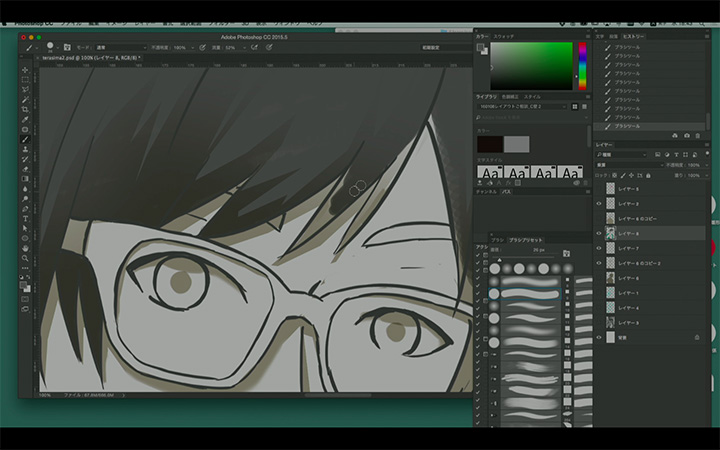
Similarly, let’s go to the hair. It gets troublesome when you increase the number of layers, so let’s try working on the same layer but avoid overlapping the colors (cardigan and hair), like how Miwa does it.

It’s the best to split each part into different layers and naming them. But it’s pretty troublesome (lol)
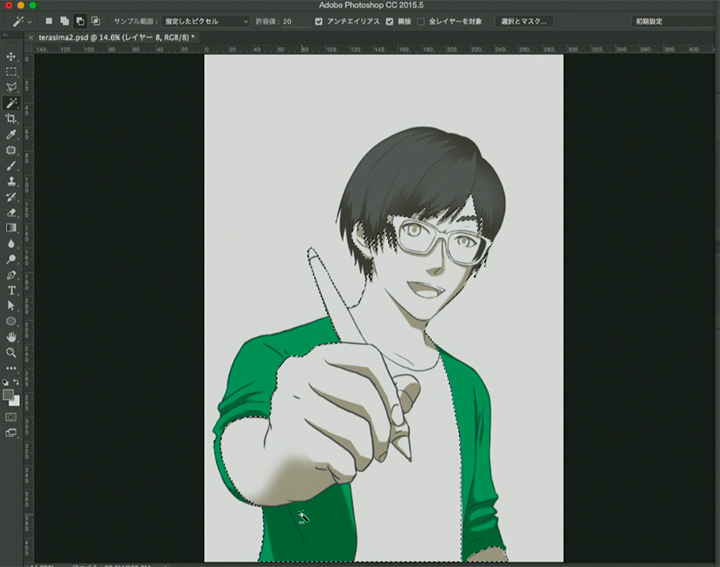
Done with the hair and cardigan!
On to the skin. Coloring will be a piece of cake if the lining has been done carefully.
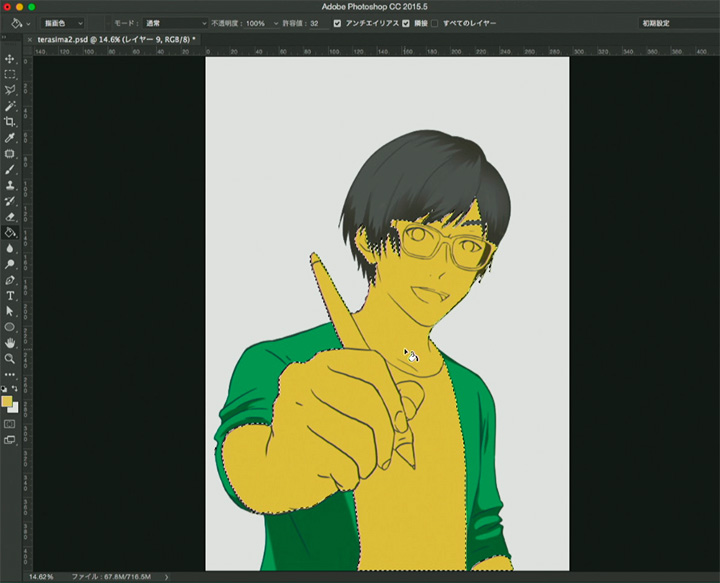
Let’s color in the skin. Choose the Magic Wand tool, press and hold the alt key (option for Mac), and click on the skin. Areas with skin will be selected.
If your lines are properly connected, this shouldn’t be any problem. Being careful in the early steps will help you out later on.
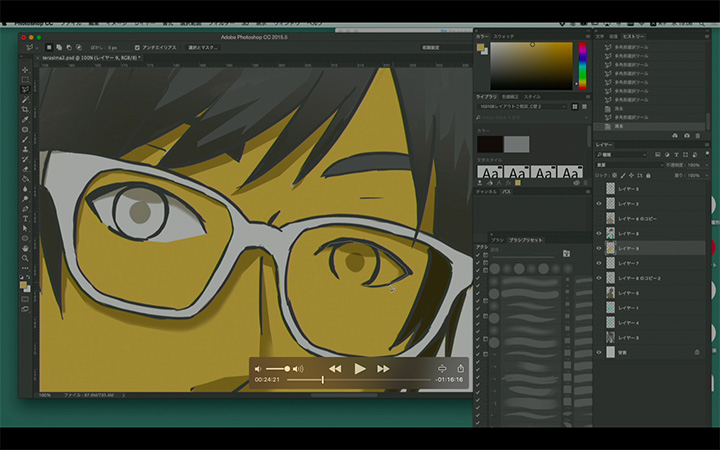
Color in the skin in the new layer with the Fill tool, evading the eyes and glasses and pen etc. first and this will lead to easier process and it’s time saving as well.
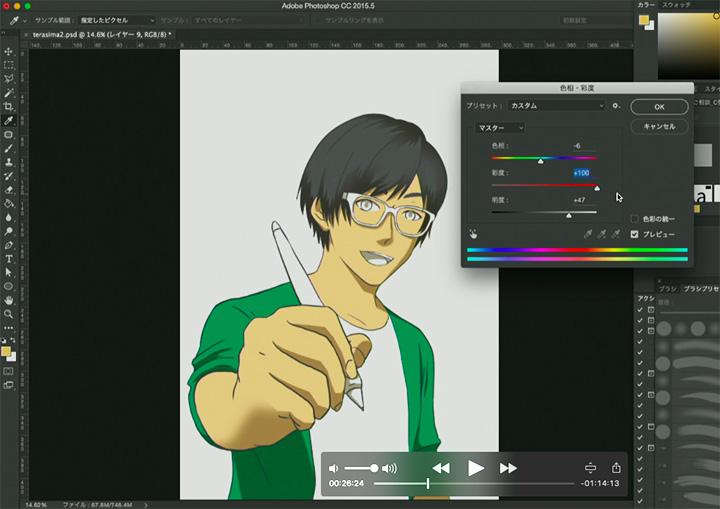
Adjusting the skin tone slightly from being too yellow will make it look even more real.
One more step to make the shadows look more natural
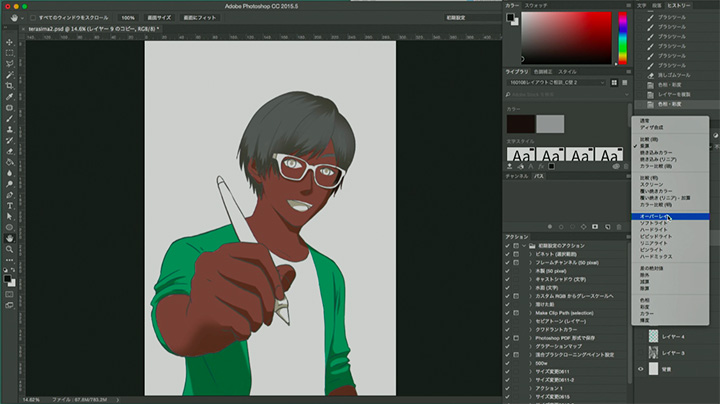
Let’s go one step further.
Duplicate the skin layer and make the color slightly darker. Choose Overlay, and the shadow layer will become a rich skin color.
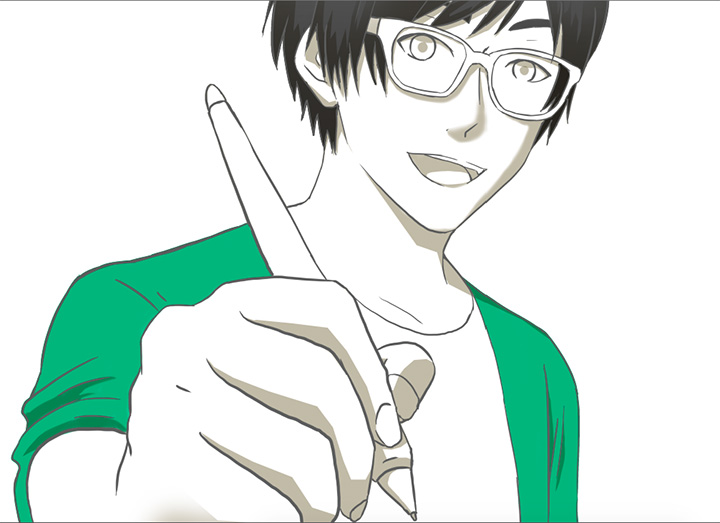
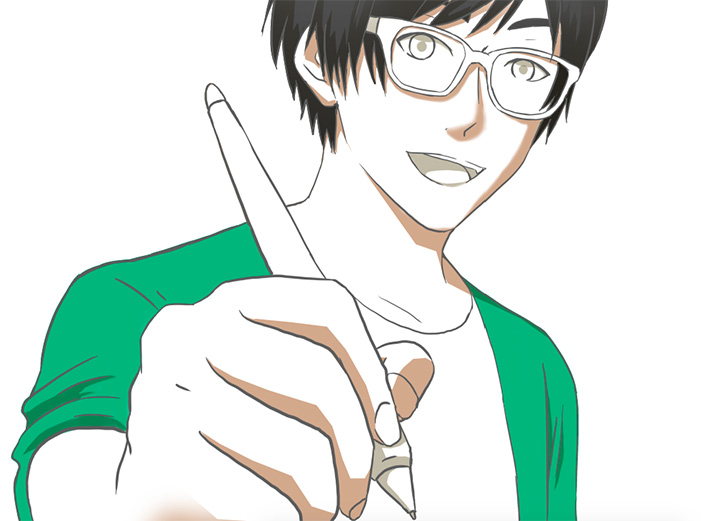
The difference is obvious. The color of the shadows went from grey to a natural skin color.
Highlight the eyes to finish it up
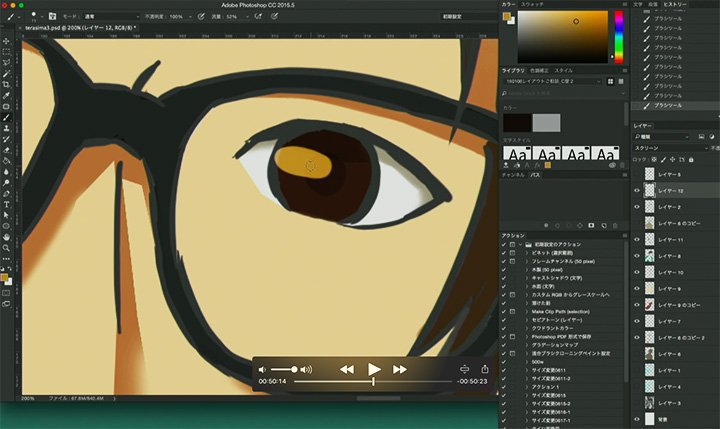
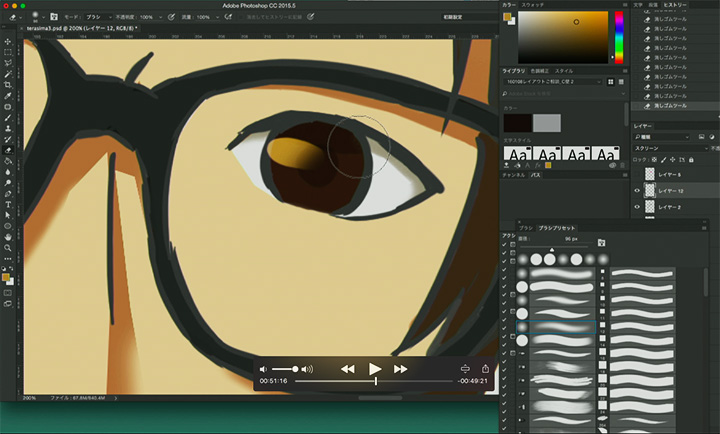
Finish up the un-colored areas, before heading to the eyes.
Use the eraser tool to give the highlight of the eyes a gentle gradation.
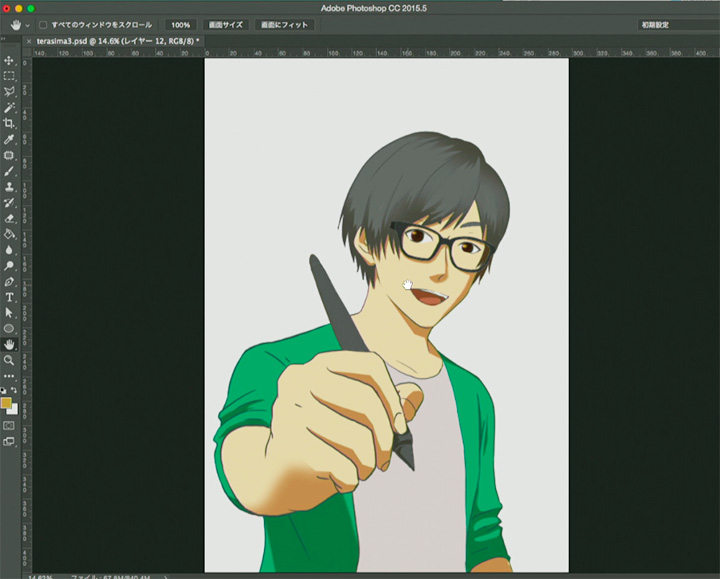
We’re done with the basic round of coloring!
Thanks to the shading we did beforehand, coloring was really easy.
Let us pile on the details from here on. The finishing touches you could say.
Increase the quality! Be aware of the direction of the light
Here are the finishing touches to make your illustration much more impressive.
In addition to the shading which has increased it’s 3-dimensionality, we can add on to that but taking note of where the light is shining from.
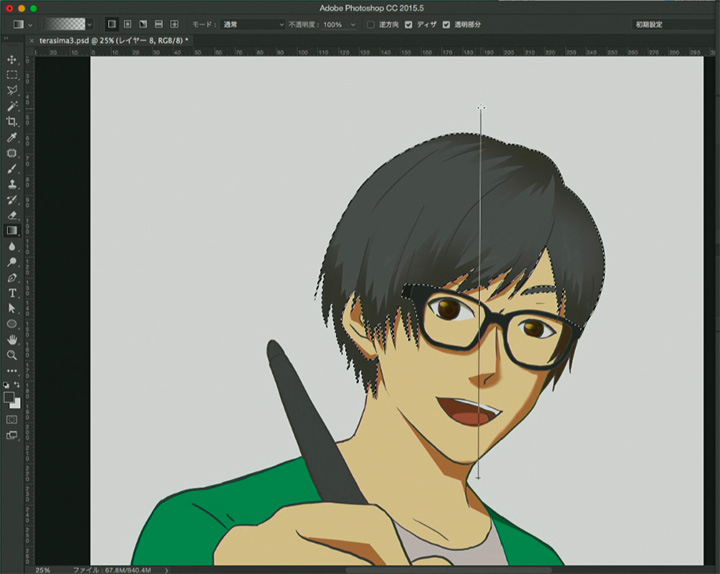
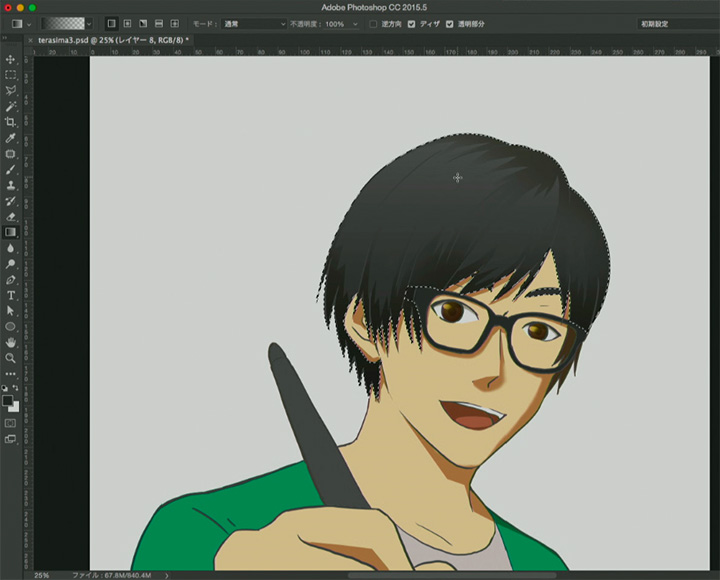
Let’s begin with the hair which takes up a large portion of the illustration.
Select the hair by specifying the range, and add a gradation of a slightly darker color. Aim for a natural look, and repeat this numerous times from bottom to top.
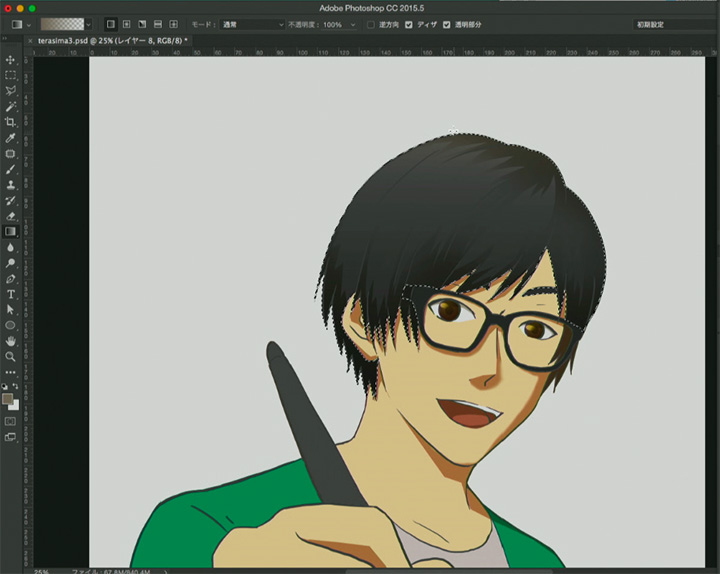
Light shines heavily on the top of the head, so change the base color (brown here) and give it a gradation top down to improve the effect.
Use brush effects to play around with the hair highlights
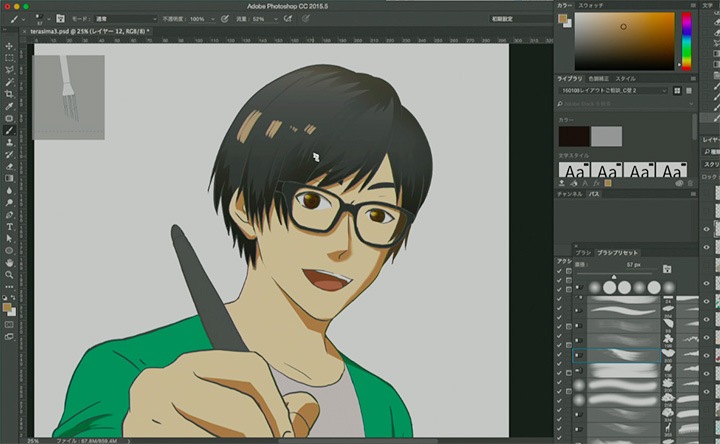
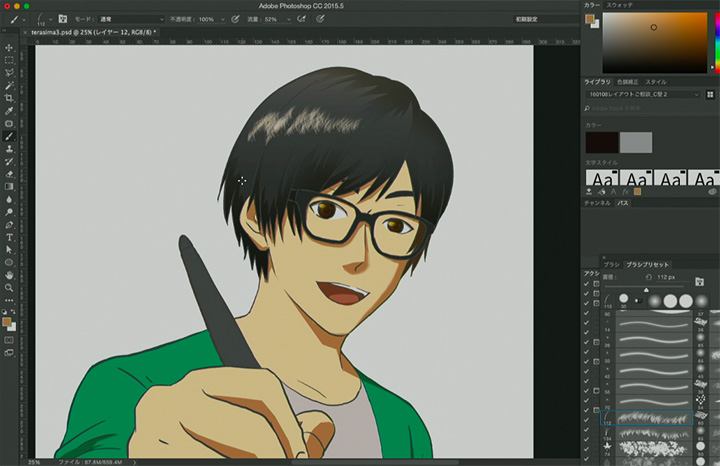
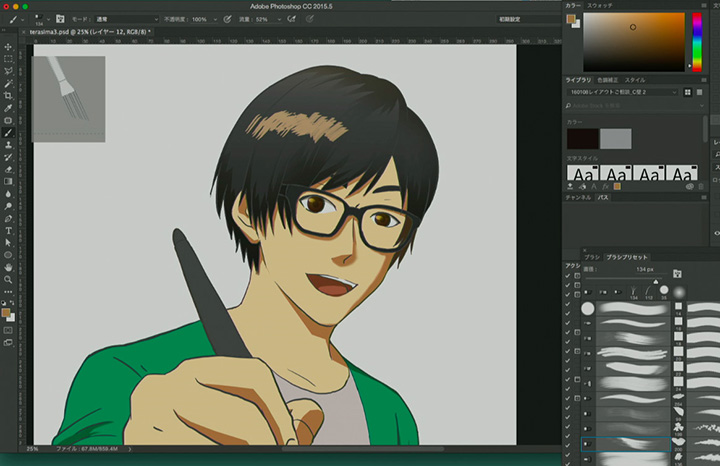
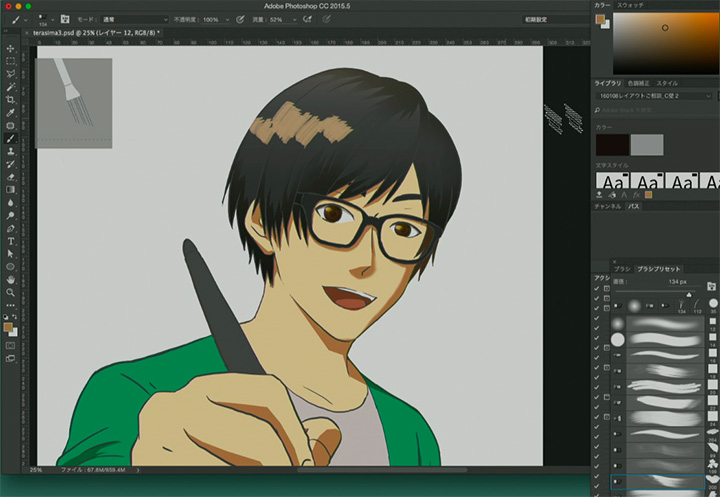
We tried out multiple brushes for the hair highlights, and settled on the last one. Rub it gently with the eraser tool.
Done! Or so we thought, but Miwa tells us to brush it up?!
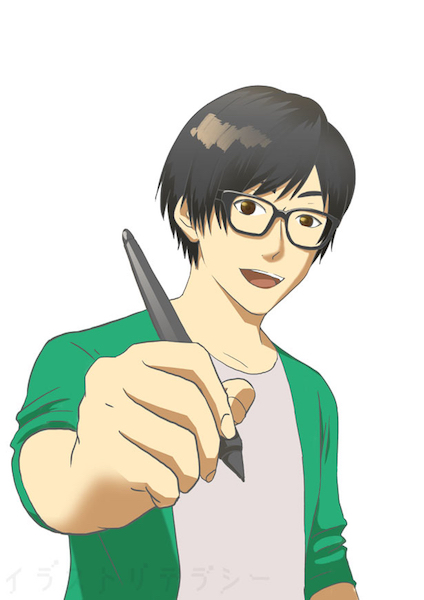
Complete with highlights on the tablet pen and glasses!
But Miwa tells us to go one step further. How will it change?!
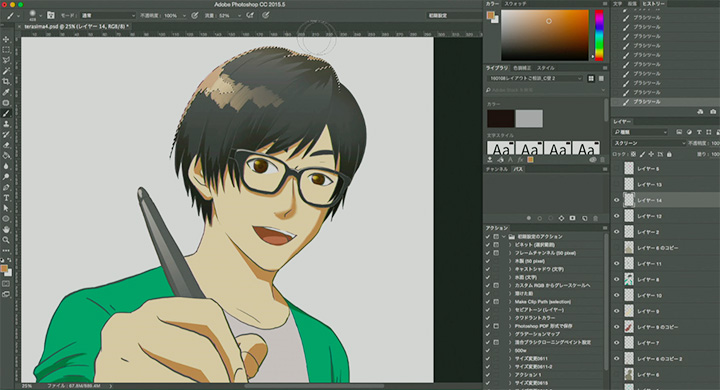
Adding highlights onto the hair. Create a new layer (Screen for the layer mode), and add a brighter color.
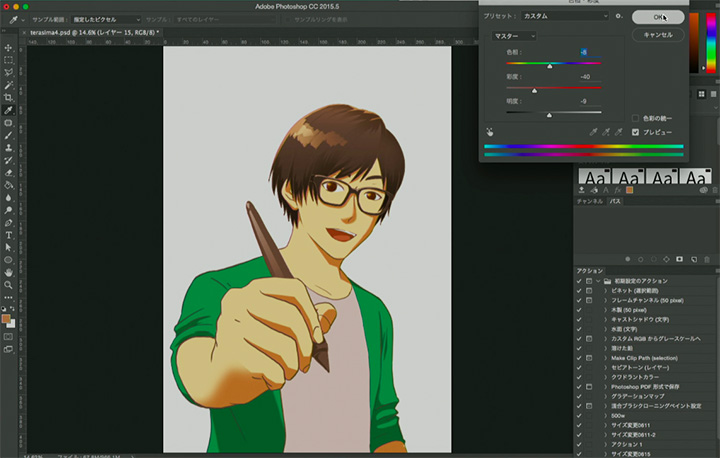
Create a new layer on top of that. Choose Overlay, and even out the overall tone. By changing the color here, you can take into account changes in the time of the day.
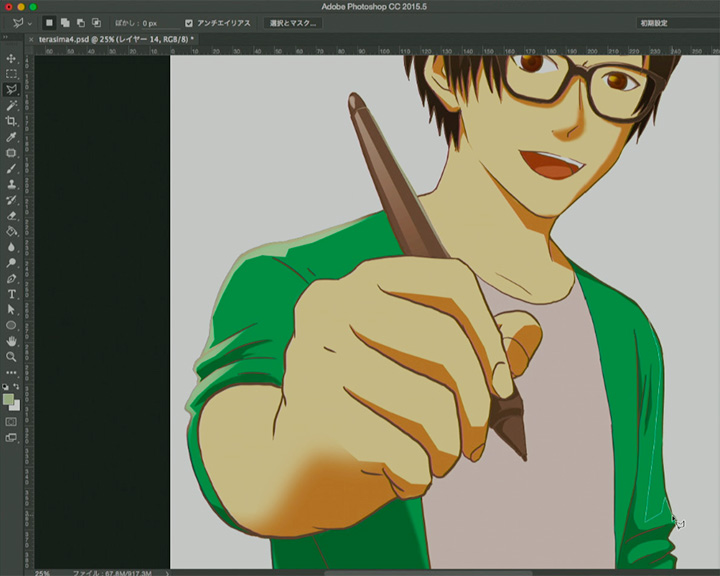
When the overall tone is complete, do the same for the cardigan and the pen.
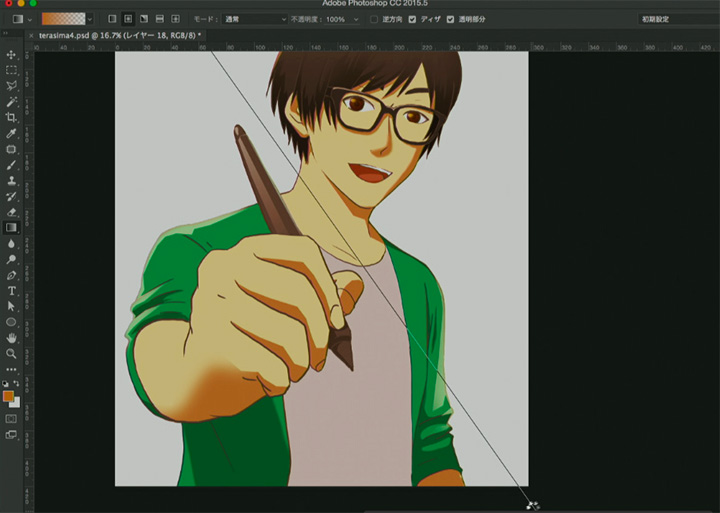
To create a light that hits diagonally, create a new layer (Color dodge for the layer mode) to add gradation to it. Adjust the color to create a more natural effect.
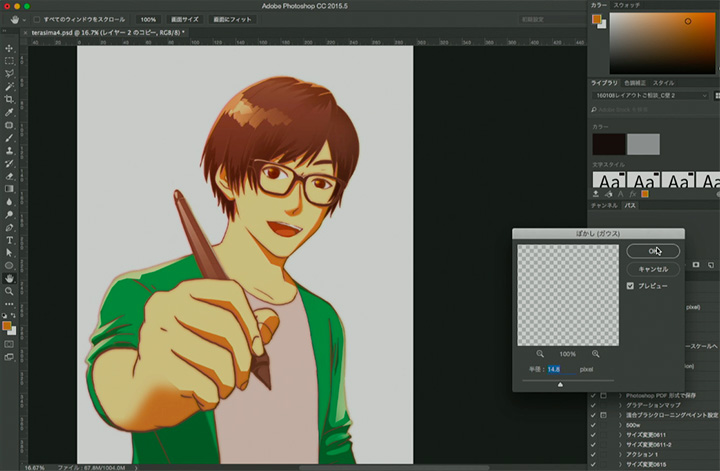
Finally, duplicate the lining layer, add the gauss effect, to give it a softer feel, and we’re done!! Good job.
Here’s the completed illustration!
After finishing the illustration, we asked lecturer Shirow Miwa about his thoughts and how to improve the coloring for the color illustration!
Terashima’s best quality is his sharp eye
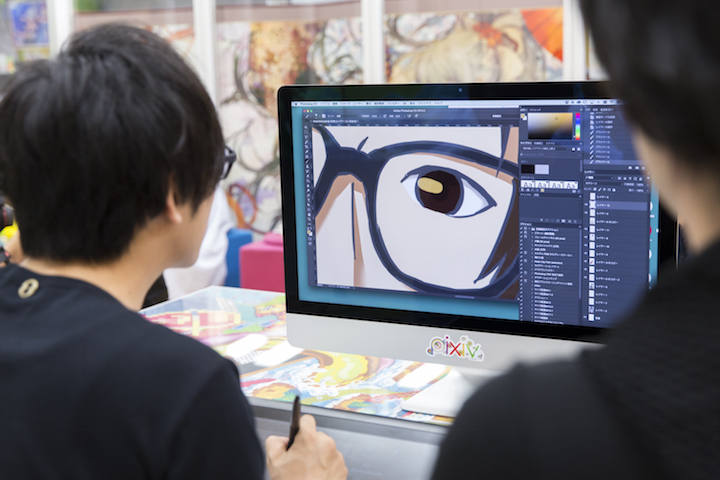
- Good job. We completed it.

This time, we challenged lining, shading and coloring, all the processes I normally carry out, and Terashima was quick at remembering the steps, and understanding how which process led to what effect, and was thus very easy to teach. I never had to repeat something twice.
- What is the reason behind the style you adopted?

There’re so many deadlines when drawing for work. When there’s a never ending pile of things to be done, there’s bound to be one or two impossible things.
“Coloring this number of characters will take about this amount of time”
I calculate this way, and there was a need to simplify my work process. By making my work process into a routine, it became my current work style of not using too many brushes.
Line art, creating the shadow layer, overall base color, finishing touches...by having a fixed routine, it is easier to schedule work.
- As Terashima progressed just now, he became faster and faster didn’t he?

As the illustration nears completion, it becomes clearer which parts are still imperfect. In this illustration, it was easy to have a vague idea of the final product, increasing the level of motivation.
Terashima was also sensitive towards areas that were not complete and was able to fix them himself. I barely had to step in. He really has sharp eyes.
This isn’t about skills, but your attitude, and I think he is really suited towards this.
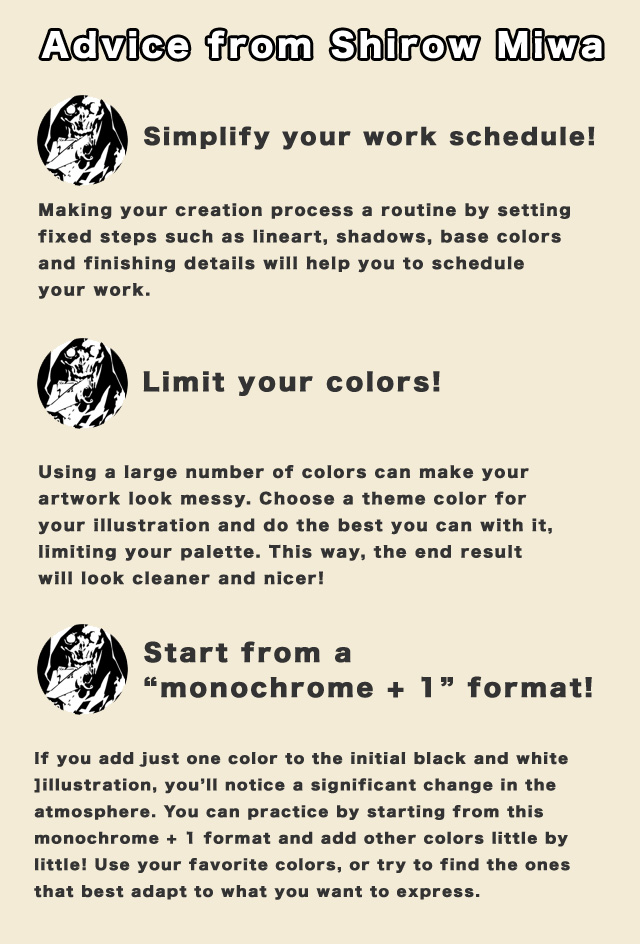
To improve as a color illustrator, is to set limits!
- We completed a color illustration this time, but I think that there’re many users on pixiv who are not very good at color illustrating.

We managed to complete a simple full color illustration on the PC, so you may feel like using more colors next. However, some colors go well with others and some don’t, so the more colors you use, the messier your work will become.
By using a large range of colors, your illustration may end up looking greyish.
That’s why, people who are bad at color illustrations should pick a theme color, and set limits to the colors used.
By limiting the colors used, your illustration will turn out cleaner and nicer.
- Any advice for people aiming to become color illustrators?

I often do it even now, but it may be good to start with “monochrome + 1 color” drawings. Black will firm up the image, and adding just one color to it will completely change the feel of the illustration.
By trying out different colors, you may find a series of colors you like using, and try finding colors that match those colors, so on and so forth. Increase your palette little by little.
I’m sure you’ll be able to find a color that suits your style and expression.
Let’s hear from Shirow Miwa! 3 rules in drawing!
Preview to Takuma Terashima’s Illustration Literacy #4! A new task from Miwa?!
Terashima managed to finish his self-portrait in this series that lasted 3 parts. With much help from Miwa, he completed a beautifully done up portrait! Do heed Shirow Miwa’s advice like Terashima and attempt drawing such brilliant illustrations!
It seems that Miwa has a new task for Terashima next round, which is to draw an original illustration from scratch….
What kind of illustration will it be! Look forward to it!
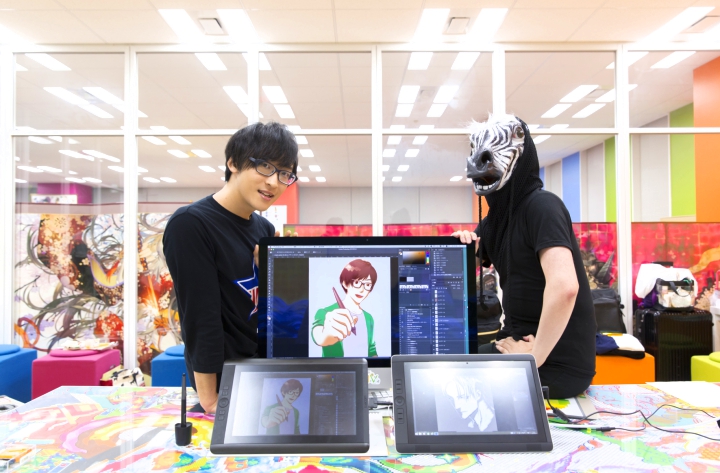
Pen tablet used

Here’s the tablet Takuma Terashima used!
- Takuma Terashima
- <ul>
<li>Born 20 December/Ishikawa Prefecture/Works at AXL-ONE/Starred in the Uta no Prince Sama series (Otoya Ittoki), SUPER LOVERS (Shima Kaido) etc. Released his 6th single, sunlight avenue on 17 August 2016 (Wed).</li></ul>

- Shirow Miwa
- <ul>
<li>Manga artist/illustrator.</li>
<li>Debuted in 1999 with BLACK MIND and Ultra Jump. Currently publishing DOGS/BULLETS&CARNAGE following -DOGS-.</li>
<li>Joined music group supercell as an illustrator in 2008, and designed the jacket cover of their major debut single, Kimi no Shiranai Monogatari. In charge of character drafts in the animes Kiznaiver and Joker Game that aired April 2016, and has done many other jobs in various areas.</li></ul>


Follow Terashima’s official pixiv account, and don’t miss his updates!
Takuma Terashima’s official pixiv account where he will post his illustrations has opened! Illustrations featured in this series, and other illustrations drawn in his private time will be uploaded here…?!
Do follow him.
Find his pixiv account here!
The video of this round’s release is up now!
Don’t forget to check KIKI for each round’s updates!
KIKI by VOICE Newtype