• English
  • 简体中文
  • 繁體中文
  • 한국어
  • ภาษาไทย
  • Bahasa Melayu
  • 日本語
pixivision
Make it interesting
Explore
  • Illustrations
  • Manga
  • Novels
Create
  • Tutorials
  • Behind the Art
  • Materials
Discover
  • Interviews
  • Columns
  • News
  • Top
  • Behind the Art
  • Interview with the artist “Wannyanpuu” and making of “Ugoira!” The particulars behind the creator’s craftsmanship.
Behind the Art
2016.07.29

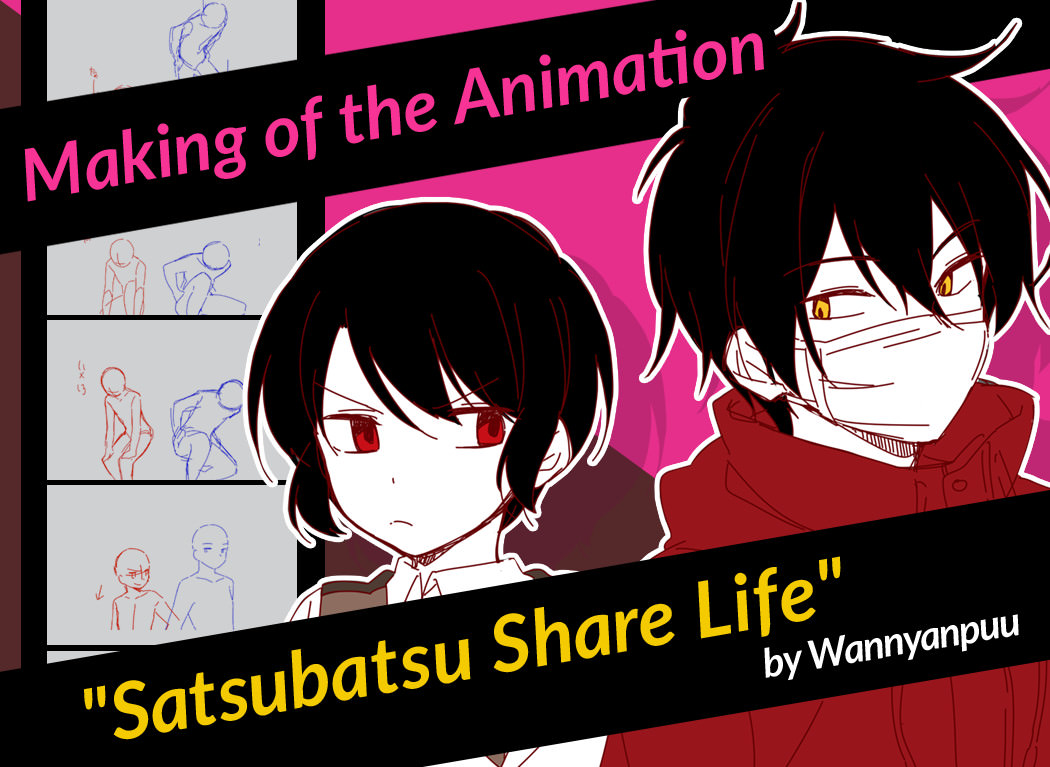
Interview with the artist “Wannyanpuu” and making of “Ugoira!” The particulars behind the creator’s craftsmanship.

  • interview
  • making-of
  • creator interview
  • Ugoira making-of
Editor: Yohei Ogawa

“Satsubatsu Share Life” is a celebrated comic uploaded to online pixiv Comic.

A vampire named Fuji and a slit-mouth man, Sakiguchi, receive divine punishment for past transgressions in the form of being made to cohabitate together. The first volume of “Satsubatsu Share Life” was released Wednesday, July 27, 2016 !


The one taking charge of the sequential drawings is none other than “Wannyanpuu,” the alias of the artist behind “Satsubatsu Share Life.” She is a triple threat who not only writes manga, but an illustrator and animator as well. Character subtleties like the dynamics of animating facial expression isn’t common knowledge to ordinary people.


To celebrate the release of “Satasubatsu Share Life” we will be getting an exclusive look behind the creation of a Wannyanpuu’s Fuji and Sakiguchi “Ugoira!” Let’s view the approaches that Wannyanpuu uses to breathe life into these characters. 

Fuji and Sakiguchi moves?! The making of Ugoira

Wannyanpuu has delivered a behind-the-scenes, look into the making of an “Ugoira.” One can find herself drawing and redrawing a scene countless times before they can produce a result they take pride in. 

1. Artist Sketch
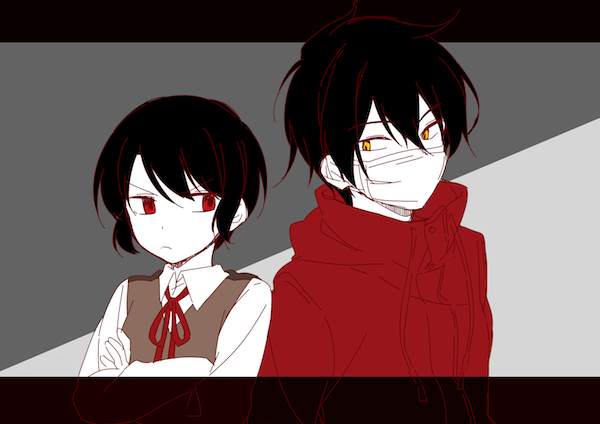
Application: CLIP STUDIO PAINT EX, Photoshop

First, think about the atmosphere of the overall clip, then choose your colors.
*Here I have decided on the method of editing of the files, so later on when it comes time to color and other edits I won't have to stress about it.

2. Roughs

Application: RETAS STUDIO Stylos
*Stylos: A digital drawing tool packaged into RETAS STUDIO

From here, I will move forward with the use of a program called RETAS STUDIO, a type of animation software. By the way, even with the use of SAI or another tool, as long as the basic steps here are followed, your result won’t change.


When you have determined the direction you want the illustration to go in, advance to sketching out your roughs! You do not have to spend time on the fine details at this point, but the movement must be decided at this stage.

Since I have decided on the direction of the animation, this is the where the most important work begins. Basically, I use my head the most here...
In the beginning, I would draw the entire form but I thought that was boring and so I changed it to a close up of the top portion. This time I decided to draw a landing scene, and so I explored ways to animate it with a cool feeling.

Drawing the landing required thinking about how things like the movement of the arms and legs would work in reality. The fact is that since I will be drawing an animated person, rather than realistic, the result was more “anime-ish” than I thought. 
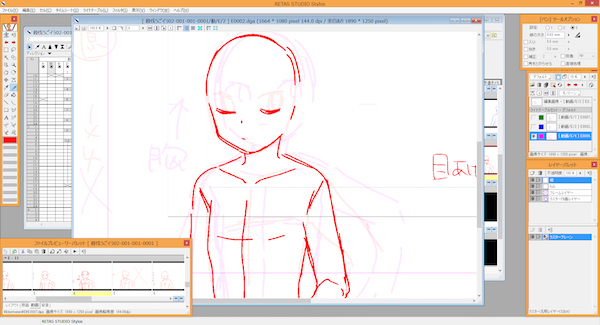
I went with an airy maneuverability for Fuji, and gave Sakiguchi a loose and relaxed image in the animation.

When the animation is beginning, the movement will be pretty shaky. Give close attention to the fluctuation of the shoulders and neck so that the movement flows together. 

A cut labeled “tame” is an expression used to represent the end of the animation sequence. To see a complete perfect stop, make it a point to “slow down” the frames before ending. ”Tame” cut are movements that shift slightly to match the direction of the drawing.
Numerical characters show the point of immediate division, in this case (5x7) five frames with an additional seven are divided up, or in the case of (16x19), 16 frames are split into 19 frames. In other words, (from 21 through~) 21 frames will be inserted. To summarize, it’s post-justified/ pre-justified.
*Justified/post justified...it is an animation production term. It indicates the division of when to begin (rapidly, slowly) and how to pace the scene.

3. Rough Drawing

Application: RETAS STUDIO

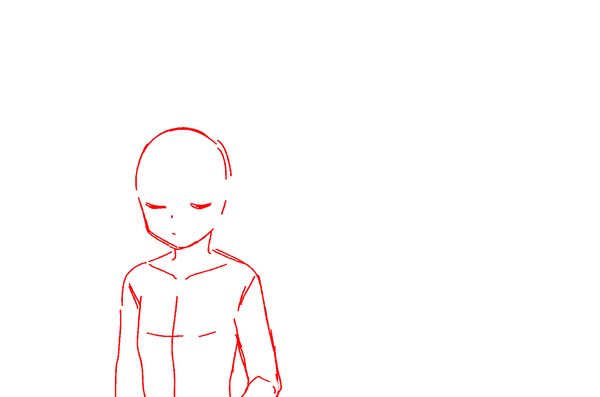
It’s time to proceed with the next set of roughs. Because the final movements have been confirmed, use solid lines to draw the rest of the body. 
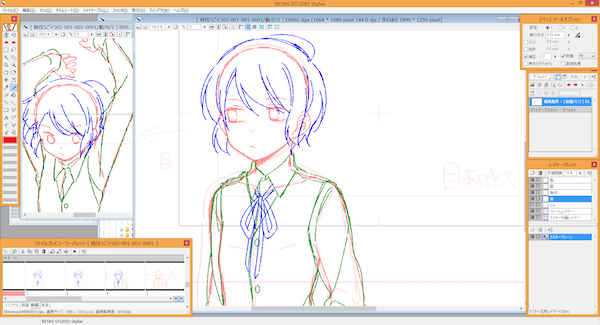
If at this stage you are not satisfied with the results, now is the time to correct the roughs and underdrawing… at any rate, until you are satisfied with your own movements, continue to draw and redraw!

Once the details of movement are understood in this undressed state, I move onto adding the hair and clothes. At this point, the movement of things like the hair and ribbon, and the weight of the hoodie’s strings are exaggerated to make the motion appear more flashy. 

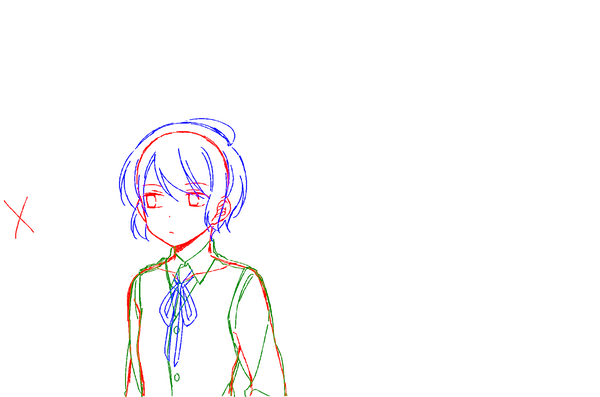
Somehow, I felt that it might be better to have the characters shut their eyes in the rough drafts...but I went ahead and left the eyes open. Actually, there are also changes in the movement and the base rough. 

Let’s see the parts that Wannynpuu has altered in the comparison of the drawing roughs!

4. Lineart
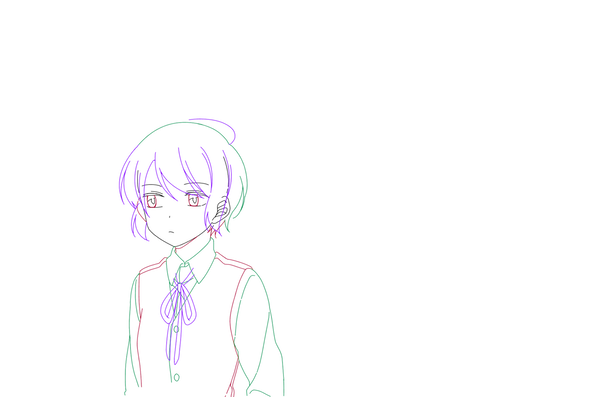
Application: RETAS STUDIO Stylos

The lineart. The rough underdrawing is traced over smoothly. Smooth, continuous lines are used to ensure the quality of the lines. 

Since I am cautious to avoid any blunders in overlapping lines, I have prepared different layers in advance to draw on. If you want the animation to flow well, the unnecessary parts are erased, and I have filled everything with black. By the way, this is the stage where to add any shading.

The use of the curve tool on the hair and in between animation seems to make this process fun.  

5. Coloring
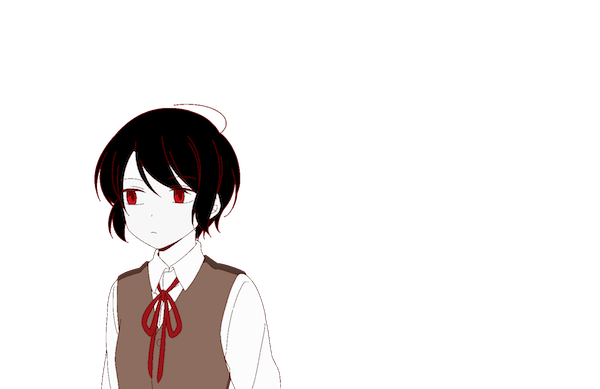
Application: RETAS STUDIO PaintMan
*PaintMan: A specialized anime pen tool packaged in RETAS STUDIO

Next, I switch to PaintMan software from Stylos and begin coloring. Here, colors determined back in the artist sketch are used.


The foundation bucket (fill bucket) tool fills in everything. RETAS STUDIO Paintman, before the application, the image threshold is converted doubly. 
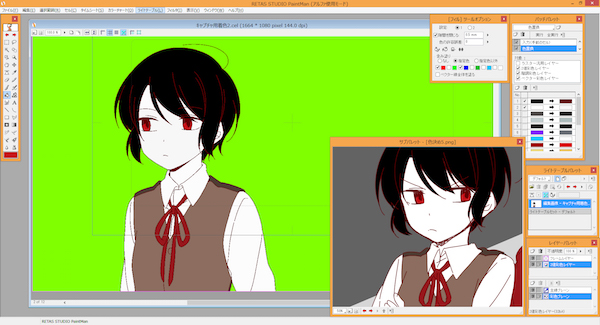
The sample palette (the small screen on the right hand side) allows you to use a dropper tool on the artist sketch and is very useful because you can use color as you apply!
Applying the color, once again, if I think “something’s a bit off….” and go back in to fix the unnatural parts. 
Application: RETAS STUDIO CoreRETAS

The following work is completed by switching software again. This time a photography editing tool called CoreRETAS is used and here is a summary of everything that has been used up until now.


The final background checks of Fuji and Sakiguchi have been made and now it is time to check how they move together! Because I had made the cells move vertically, the movement of the camera will appear to follow them both.
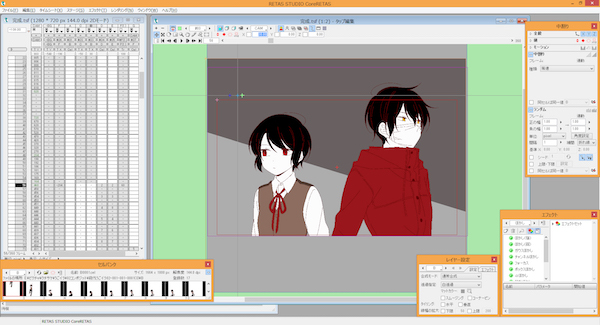
At this point, the final standing positions of the two will be determined. 

Their synchronized movement can be checked easily since the distance has been adjusted here. 

At this point, the shading process can also be done. 

6. Completed!

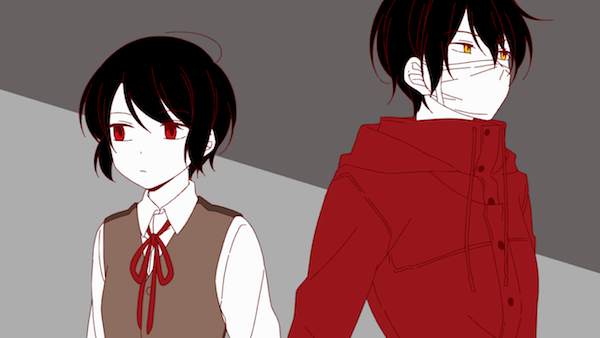
Here is the completion of “Ugoira!”

I think one must be patient if they want to animate. Although I also can become confused, it is my hope that you continue to work through the challenges without giving up. Taking your time, you will be able to enjoy this process!
Next Page : The origin of Wannyanpuu!
123

Newest articles tagged Ugoira making-of

  • Showing the Making-of Using Ugoira!

    Showing the Making-of Using Ugoira!

  • The Making of 13 Copic Drawings - A Lesson in Coloring

    The Making of 13 Copic Drawings - A Lesson in Coloring

  • The Making of 15 Watercolor and Colored Pencil Drawings - A Glimpse Behind the Scenes

    The Making of 15 Watercolor and Colored Pencil Drawings - A Glimpse Behind the Scenes

  • Animations of Works In Progress - Capturing the Creative Process

    Animations of Works In Progress - Capturing the Creative Process

If you liked Ugoira making-of, you will also love...

  • Wait a second! (Almost) Useless Tutorials

    Wait a second! (Almost) Useless Tutorials

  • Creating sparkling, kawaii drawings - Making & Interview With Eku Uekura

    Creating sparkling, kawaii drawings - Making & Interview With Eku Uekura

  • Tutorials with within 10 steps!

    Tutorials with within 10 steps!

  • Rella making-of and interview - Drawing a peaceful and elegant world with Adobe Photoshop CC

    Rella making-of and interview - Drawing a peaceful and elegant world with Adobe Photoshop CC

Share this article
  • Share
  • Post
  • Share
  • Post

Tags:

  • interview
  • making-of
  • creator interview
  • Ugoira making-of
Follow pixivision on Facebook!
Find us on X too!
Follow @pixivision
Stay updated with pixivision's daily features!

Newest articles tagged Behind the Art

  • The Making of 13 Copic Drawings - A Lesson in Coloring

    The Making of 13 Copic Drawings - A Lesson in Coloring

  • The Making of 15 Watercolor and Colored Pencil Drawings - A Glimpse Behind the Scenes

    The Making of 15 Watercolor and Colored Pencil Drawings - A Glimpse Behind the Scenes

  • Are you ready for Comiket? Useful Techniques For Your Event Booth

    Are you ready for Comiket? Useful Techniques For Your Event Booth

  • Wait a second! (Almost) Useless Tutorials

    Wait a second! (Almost) Useless Tutorials

View more▶︎

Follow pixivision's
official accounts!

p-chanMonthly Ranking
  • Illustrations

    Drawings of Patterned Bikinis - Pre...

  • Illustrations

    Drawings of Pools at Night - After ...

  • Illustrations

    Drawings of Flared and Frilled Biki...

  • Illustrations

    Drawings of Streaked Hair - Lucky S...

  • Illustrations

    Drawings of Upward Glances - Puppy-...

p-chanFeatured
  • Illustrations

    Fan Art of Hoshimi Miyabi from Zenl...

  • Manga

    [English] Bringing pixiv works to t...

  • Interviews

    How illustrator Namie conceptualize...

  • Illustrations

    Fan Art of SILENT HILL f [Spoiler/C...

  • Illustrations

    [Featured Articles] Fan Art of Zenl...

Follow pixivision's
official accounts!

  • Top
  • About pixivision
  • Suggest a theme
  • English
  • 简体中文
  • 繁體中文
  • 한국어
  • ภาษาไทย
  • Bahasa Melayu
  • 日本語
  • pixivision
  • About pixiv Inc.
  • Terms of Use
  • Contact Us
  • Advertising
  • Privacy Policy
©pixiv